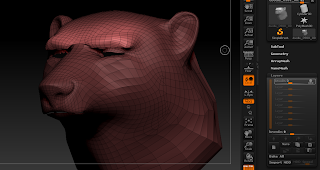
These are a few notes tips for making this brow blendshape/shape key in Blender.
First here are some blendshape sculpting tips in ZBrush, i mostly used the mask lasso tool, move tool, move topological tool and smooth.
then here are some tips on making an animator control that gives the sculpted brow pose:
zbrush export each blend shape layer as obj (be nice to have a zscript that does that)
blender import objs
+ icon in ‘upside down triangle object menu’ to add a shape key
add shape key from different object select it then main mesh which has basis shape key and click down arrow join shapes
if sculpting blend shape do it in edit mode.
-making control for brow blendshape
in edit mode extrude bones to create a bone in a single axis, deleted unneeded bones afterwords (x).(shift+a was shortcut to add a disconnected bone when in edit mode of armature)
in object mode add mesh circle
in pose mode under little bone icon, custom shape choose the created mesh curve
display wire — to see bone shape
m - move animator control widget created to new layer, shift with two layers selected to see both layers
figure out max/min to move animator control to make brow up shape be at 1, brow dn shape at 1,
my example was z +.2, -.2 (locked all axis but z in transform panel)
-to setup brow up/dn driver for blendshape/shape key (like maya’s set driven key frame)
—over number in shape key right click ‘add driver’ manually create later single
—split window sliding lower existing window, pick graph editor, change bottom lower next to key to ‘Drivers’
—N to bring up panel
In Drivers Tab select drivers tab
—in drivers tab pick ‘Averaged Value’ for Type
—object - pick rig armature object that has control bone
—for bone - enter animator control for shape key
—enter z location since for this example controller moving in z turns on brow blend shape
—enter local space
In F-Curve Tab, select F-Curve Tab
— right click to select second keyframe, set frame to .2 value 1. meaning at when z of animator control is at .2 the brow up shape key should be fully on at 1.
In Drivers Tab
— click ‘Update Dependencies’ to see change in action
Happy Sketching,
Nate
Inspired by
Denis Zholob’s (Tutorial: Custom Bone Shapes in Blender) https://www.youtube.com/watch?v=6aRdurh30f0
d-dub show (Tim Pt 16 Facial Rig, Custom Bone Shapes, Shape Key Drivers) https://www.youtube.com/watch?v=Jto3RZQ88tY
Dan Pro’s (Face Rig Part 8 Lip Rigging With Shapekeys and Drivers) https://www.youtube.com/watch?v=uU5GP5s8GMI
other hotkeys
shift+s (can move cursor to selected, use again to move selected to cursor)


